
|
Build Thread: Estes Saturn V #1969
3 Attachment(s)
I've opened and inventoried the contents of this exciting kit. I've assembled the (5) faux engine bells that "The Vixen" will paint by hand. I've also joined the halves of the (4) molded styrene fins and welded then internally with Tenax7r.
The hollow construction the fins begs me to "post mount" them to the airframe--much like I did with the 1:45 scale Little Joe II. Instead of rods cut from bamboo chopsticks like I did with the LJII, I'll cut the rods from bamboo grilling skewers. Here we go! TBC |
I forget if it has been mentioned on this forum, but there is an issue with the wrap not lining up properly...I believe Chris M has a write up on his blog about it. I look forward to following this thread! Your Mercury Little Joe helped me along.
EDIT: linky to blog http://modelrocketbuilding.blogspot...rn-v-inter.html |
Ah so! Thanks for the link.
TBC |
1 Attachment(s)
The CM and LES is now assembled. The construction is a downsized match of the 1:45 scale LJII capsule and LES. The escape motor is a length of 3/16" launch lug instead of the usual molded plastic "stick" that was often warped in the previous SV kits. I much prefer this new one.
TBC |
1 Attachment(s)
The base wrap of the upper stage taper is a little too tight on both the BT and on the coupler, so I'll remake the conical wrap by enlarging the flat cutout by a BCH (2 or 3%) onto card stock and then trying it again.
This will have to wait until I return from a job in Burlington, NC. TBC |
Quote:
That's how the Centuri escape motor was done. :cool: |
Quote:
The 2157 had a fitment issue there also. I haven't built one, but my son had to print a new wrap for his. |
Ah so. Then I’m glad I scanned the card stock sheet.
TBC |
Quote:
Shouldn't a job in Burlington, NC have to wait until you finish this build thread? |
Quote:
I wish. |
Quote:
Haha, years ago I worked from home. Sometimes the draw of the rocket room in the basement was just too much. I’d “take a break” to sneak in a few minutes, especially to go outside and spray some paint. Then I’d resume working after dinner, well, some of the time ... :rolleyes: |
1 Attachment(s)
Success!
Fortunately I made a scan of the original cardstock sheet before I cut it out. I enlarged the image by 1%, printed it onto .010" cardstock, cut it, curled it, glued it, and now the fit is perfect. Now I hope the vacu-formed outer wrap is the correct size. I have a plan for that if it isn't (I just don't know what the plan is yet.) :o |
BCH ??
|
:rolleyes: I think Jeffy has mentioned many times of the red haired vixen. So as not to offend, instead of RCH he used BCH
|
Quote:
BHC is an ancient machinist's term to refer to a VERY small amount. It may even date back to Archimedes. :rolleyes: ....and yes, as with most abbreviations that submariners employ, the translation is vulgar. TBC |
5 Attachment(s)
It's hard to believe it's almost May! Today in N. Illinois it's alternating between rain and snow. You guys up in Wisconsin must be getting clobbered! I could have stayed in Burlington, NC. It was 85+ degrees and my rental car was a convertible.
Because I can't decide which adhesive to use to attach the vacu-formed wraps to the build, I've shifted gears on the SV build and I've assembled and improved the engine mount/stuffer tube. The engine mount/stuffer tube I've build according to the directions except as with every 1:100 scale I've ever built I've made these changes to the shock cord mounts: Using the largest die of my leather punch I make (2) holes 180 degrees apart near the OD of the top centering ring. I then cut (2) pieces of 1/8" birch dowel to 1" long, tie a length of braided 100# Kevlar to each with a square knot, run the Kevlar through the holes, and then epoxy the dowels to the underside of the top CR. I'll cut the Kevlar cords to length when I mount the assembly into the BT-101. TBC |
Instruction error?
1 Attachment(s)
On page 5, "Install Engine Mount", Step 2, the text reads to leave 3/4" between the reinforcing ring and the end of the BT101.
The illustration says 11/16". I know it's JUST 1/16" difference but I'm meticulous. Which one is correct? Any ideas? Thanks. |
Absent any other data points in the instructions, I'd probably go with the 19mm callout since that figure is consistant between the text and the illustration.
An online converter shows that 19mm is just a tiny tad under 3/4". Earl |
That makes sense.
Thanks. |
Hey, guys,
Would someone with the 1969 kit be so kind as to measure the length of the body tube that the instructions list as "030466 L.E.M. body tube", please? I was ordering some parts from Estes and went ahead and got the plastic LEM shroud for my #2001 kit. Now, I have to shorten the body tube to put it between plastic shroud and the capsule. Thanks. |
My calipers say that it's 1.838" long and 1.326" O.D. I don't know why the instructions call it the LEM body tube though. I think it should be called the SM body tube.
|
Quote:
You are right: that is EXACTLY what it should be called. Earl |
Quote:
Mike, I’m doing the same to my old (30th Anniversay Edition) #2157 Saturn V. Just got the LEM shrouds last week. I also bought the injection molded fin sets last year to upgrade from the vacuformed fins. I ordered 3, but should have ordered about 5 or 6. I have several more #2157s, a #2001, and several Saturn 1Bs still unbuilt. I have a built, but unpainted 1B, but don’t think I’ll change the shroud on it. I just measured my Saturn 1B and the Service Module is 44mm (1.735”) long. I assume that’s what you want. (Is this called the LEM body tube by Estes?) I would assume that part is the same length, whether Saturn V, or Saturn 1B. |
Probably because the tube goes all the way down the transition section, which on the real Saturn, hides the LEM.
|
1 Attachment(s)
Quote:
The Estes LEM Shroud is a “typical” transition, with tubes sliding over shoulders on each end. So no tube goes thru the transition. So, I think anything above the transition is really just the “Service Module Body Tube”. But, I could be missing the point ... :) (And so I’m not cutting tube until I am sure of required length.). :) |
Quote:
No, I missed something. :o I had been reading about a build thread on a 2001 kit and forgot that this thread is the 1969 kit. In addition, the 2157 and Centuri kits used a full tube with paper transition, so my brain was stuck there. However, since the 1969 kit is an evolution of the 2157, I'm sure the LEM tube name is just an artifact from the old kit. |
Quote:
For a 'general' scale model build such as these, yes, they could all be the same length. In reality however, there were some SM length differences mission-to-mission, though I've never gone through and done a rack-up comparison of them. Seems like one mission -- maybe Apollo 10 -- had a visually discernable longer looking SM, but that is about it. Overall, it seems both the Centuri and Estes Saturn V's have all had, at least to my eye, an SM tube (or the 'exposed' length of tube) that appears to be just the smallest bit on the long side. Earl |
I am upgrading a #2157 kit with the new Estes parts (thank, Bill and others). I figure that a scale Service Module would be 1.47" long based on a 14'10" actual exposed length.
The I discovered that the SM decals that I got from Gordon at Excaliber, both the silver and the chrome ones, are about 1.73", based on the old kits. Durn. Chas |
I’m glad to know the exact length is now known for the LEM/SM Body Tube, so that I can cut it down to _______ (fill in your favorite choice). :p
I’ll probably go longer on mine. Years ago we had a Grand Caravan. I liked the extra room compared to the regular Caravan. :chuckle: |
1 Attachment(s)
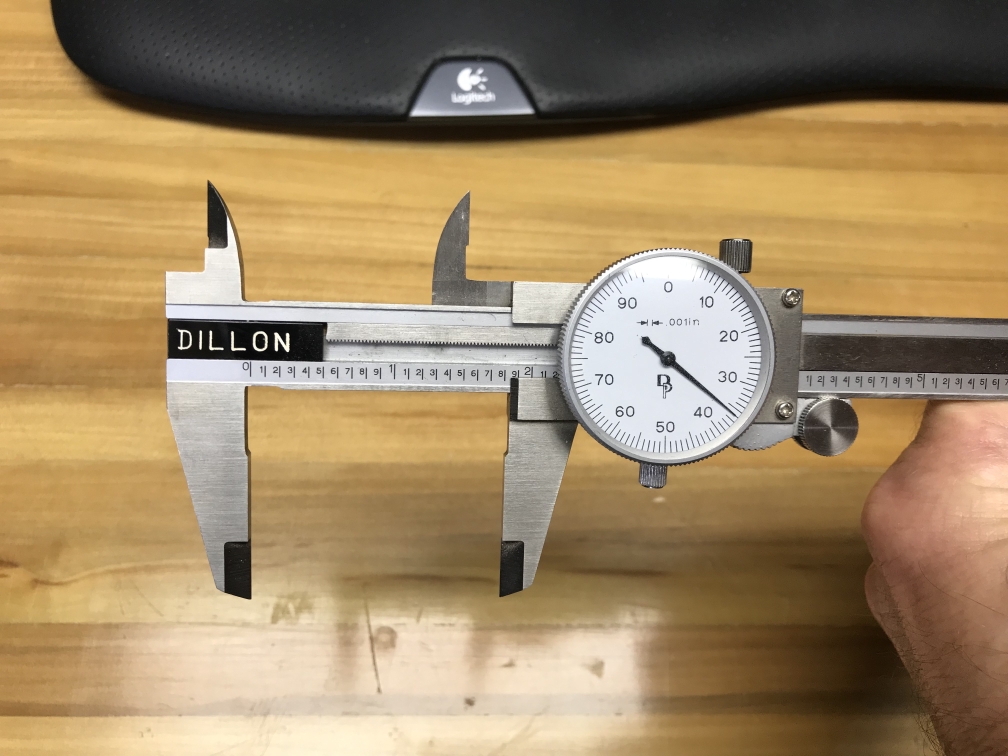
I just measured the SM (LEM?) Tube from the #1969 Saturn V kit.
I used my architectural scale ruler - The picture on the left has some perspective distortion, the end is even with the left side "0"of the ruler. The inset picture shows a measurement right around 1.82". |
2 Attachment(s)
Quote:
My reloading caliper says 1.836" |
You are probably right Jeff!
I didn't get out the caliper. |
Thanks for the measurements, guys.
|
I have a reloading caliper, too. I use it quite a bit for all kinds of different projects.
 |
Although I've never heard of any problems with the SM parachute attachment point, I thought that since the 1969 version comes with a big hunk of plastic to replace a paper shroud, I'd use it for the parachute anchor. I drilled a big hole in the top of the part so I could place a blob of JB Weld on the exposed screw eye threads on the inside. If I had it to do over, I'd go ahead sink the screw eye in as far as it would go (the threads would be completely past the other side of the plastic), since I have the JB Weld holding it from the inside.
  |
2 Attachment(s)
AT LAST!!
I finally have a little time to work on the SV #1969 build. After cutting out and trimming the 3rd stage reduction wrap I spray it with 3M #88 and apply and join it to the base wrap. The seams came together perfectly. I wish I could say the same for the 3rd stage wrap. As you can see there's approx. .125" of gap. I'll figure it out. TBC |
Quote:
Jeffy- The Centuri Saturn V wraps would sometimes be short also. The first Saturn V I got back in the day had a couple wraps that had about the same gap. I sanded the backs of the wraps some and also carefully stretched them by holding both ends and tugging them over a hard by smooth, rounded surface (like a table edge or chair back). Sanded some portions of the tubes a little too. All told, it eventually took care of most of the gap, but I think I still had about 1/16 of a gap or a little less on one, but was able to fill it in and it was not noticeable. Some of the 'collector' Centuri Saturn Vs I've picked up since vary from no gaps at all in some kits to kits that have similar gaps. Not sure if it is a case of aged plastic or possible somewhat aged and lightly swollen tubes. It was a little frustrating though for sure. Earl |
Thanks. I was even thinking about softening the wrap with a heat gun and trying to stretch it--but I suppose that has the potential to be disastrous.
TBC |
2 Attachment(s)
I'm back from a job in CT and I have some time to work on the SV.
I also had to shorten the BT a little to match the coverage of the wrap. I've sprayed the wrap with adhesive and laid it on. The gap is as I had expected and I think I have a creative solution for the gap. Stay tuned. TBC |
Jeffy-
Will be interested in seeing your fix for the gap. Frustrating, I know. I see Estes has included some extra scale 'bits' at the top of the wrap, but wondering why they decided to go with a full body wrap for the S-IVb stage on this version of the kit. I have not purchased this kit yet, so I have not had a chance to look over parts in person. Any particular reason you see Jeffy that would indicate the reason? Earl |
| All times are GMT -5. The time now is 02:12 PM. |
Powered by: vBulletin Version 3.0.7
Copyright ©2000 - 2024, Jelsoft Enterprises Ltd.